
過程
安裝 ddclient
sudo apt install libio-socket-ssl-perl \
    libio-socket-inet6-perl \
    libjson-pp-perl \
    libdata-validate-ip-perl \
    ddclient
設定 ddclient
sudo dpkg-reconfigure ddclient
下載最新版本 ddclient
如果想要更新 CloudFlare 代管的 DNS,則必須使用最新版本 ddclient。而透過 apt 安裝的 ddclient 並不是最新版本,需要手動下載。
wget https://sourceforge.net/projects/ddclient/files/ddclient/ddclient-3.9.1/ddclient-3.9.1.tar.gz \
    && tar -xvf ddclient-* \
    && cd ddclient-*/ && ls -alh
覆蓋最新版本 ddclient 至 /usr/sbin/
sudo cp -f ddclient /usr/sbin/ddclient
移動 ddclient.conf 至 /etc/ddclient/
在 version 3.9.0 之後,ddclient.conf 已經從 /etc/ddclient.conf 移動至 /etc/ddclient/ddclient.conf。
sudo mkdir /etc/ddclient \
    && mv /etc/ddclient.conf /etc/ddclient/
設定 ddclient.conf
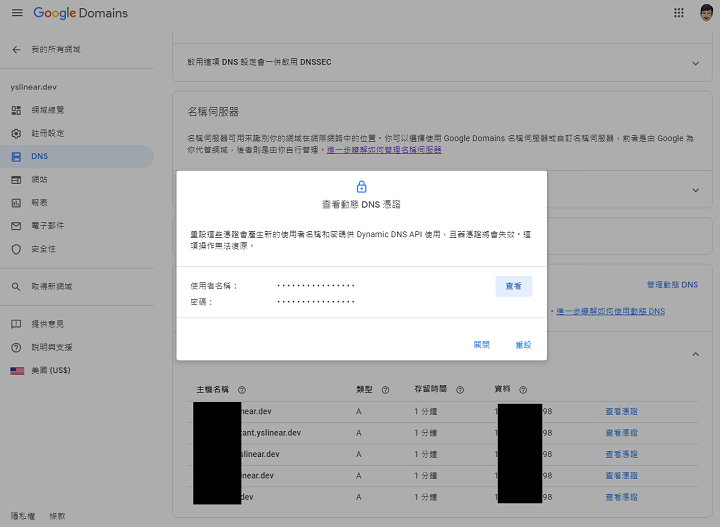
Google Domains
subdomain 的
使用者名稱和密碼可以在 Google Domains 中新增動態 DNS後,於查看憑證找到。
use=web
ssl=yes
protocol=googledomains

login=使用者名稱
password=密碼
subdomain1.domain.com

login=使用者名稱
password=密碼
subdomain2.domain.com
CloudFlare
use=web
ssl=yes
protocol=cloudflare

login=you@example.com ## CloudFlare 註冊信箱
password=xxxxxxxxxxxxxxxxxxxxxxxxxx ## CloudFlare Global API Key, 在 "My profile --> API token" 可以找到
zone=domain.com
subdomain1.domain.com,subdomain2.domain.com ## 如果有多個 subdomains, 則用逗號分隔
手動更新紀錄
修改設定檔後可以立刻手動更新紀錄。
sudo ddclient -daemon=0 -debug -verbose -noquiet --force
啟動 ddclient service
開機時自動啟動 ddclient 以定時自動更新 DDNS。
sudo systemctl enable ddclient